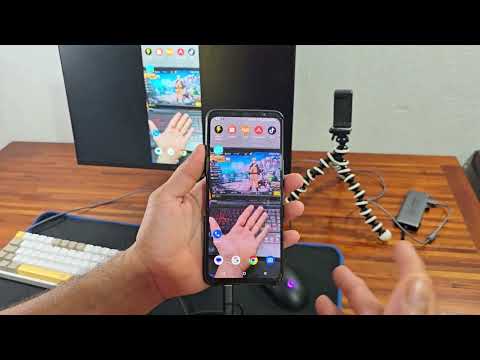
Root Any Android Phone Without PC/TWRP | Easy Tutorial [English]
Summary
This video guides users through rooting an Android phone without a computer or TWRP recovery, using a second Android device. The process involves enabling developer options, downloading and patching the boot image with Magisk, and then flashing it using a command-line app on the second phone. It emphasizes data backup, potential warranty voiding, and specific limitations for Samsung devices. The method is compatible with recent Android versions, including Android 15 and 16, allowing users to gain root access directly on their device.
Sections
Introduction and Disclaimer
Root any Android phone without a PC or TWRP recovery using another Android phone.
The tutorial demonstrates how to root an Android phone without requiring a computer or TWRP recovery, utilizing a secondary Android device instead. This Magisk root method is presented as working for Android 15, Android 16, and recent older versions. The entire process is PC-free, needing only two Android phones, an internet connection, and patience.
Warning: Rooting process erases all data and may void warranty.
A crucial disclaimer is provided: the rooting process will erase all data on the phone, necessitating a full data backup beforehand. Additionally, rooting may void the device's warranty, and any incorrect step could potentially brick the phone or cause a boot loop. Viewers are advised to watch the entire video before attempting the procedure and follow each step carefully.
Method excludes Samsung phones; check alternative videos.
This specific method is explicitly stated to not work for Samsung phones. Users with Samsung devices are directed to check the creator's other videos that are made specifically for Samsung devices.
Step 1: Unlocking the Bootloader
Enable Developer Options and OEM Unlocking.
To begin, enable Developer Options by tapping the build number seven times in the 'About phone' section. Then, navigate to System settings, open Developer Options, and turn on 'OEM unlocking'. This option permits the device's bootloader to be unlocked. After enabling OEM unlocking, USB Debugging should also be enabled to allow the phone to be accessed by another Android device via ADB and fast boot commands.
Bootloader unlocking is brand-specific; this tutorial uses a Pixel 6A.
The process of unlocking the bootloader can vary slightly between different phone brands. The tutorial uses a Pixel 6A running Android 16 as an example device but notes that the general method applies to most Android phones. The key difference often lies in the bootloader unlocking procedure itself, which is brand-dependent.
Step 2: Downloading and Extracting Firmware
Download the official firmware matching the exact build number.
Download the official firmware for your specific device model. Searching Google for '[device model] firmware' or using the exact build number along with the device model is recommended. Google provides official factory images for Pixel devices. It is crucial to download the firmware that precisely matches the current build number on your phone, as using an incorrect firmware can permanently damage the device.
Extract firmware and locate the boot.img file.
Once the firmware is downloaded, extract the archive. Inside the extracted folder, locate the 'boot.img' file. On some devices, this file might be named 'init_boot.img'. This boot image file is essential for the next step. Copy the 'boot.img' file to an easily accessible location on your phone.
Step 3: Creating the Magisk-Patched Boot Image
Install and use Magisk app to patch the boot image.
Download and install the Magisk application on your primary phone. Open the Magisk app, tap on 'Install', and select the 'Select and patch a file' option. Browse to and choose the previously located 'boot.img' file. Tap 'Let's go' to initiate the patching process. The Magisk-patched file will be saved in the Downloads folder.
Transfer the Magisk-patched boot image to the secondary phone.
After the Magisk app successfully patches the boot image, it creates a new file, typically named similar to 'magisk_patched_[random_string].img'. This patched file needs to be transferred from your main phone to the secondary Android phone that will be used to perform the flashing process.
Step 4: Flashing the Patched Image using a Second Phone
Use the 'Bugjaeger' app on the secondary phone as a PC replacement.
On the secondary Android phone, download and install the 'Bugjaeger' app from the Play Store. This app functions like a mini-PC, enabling ADB and fast boot commands, custom ROM flashing, and device rooting without a computer. The app facilitates running these commands from one Android device to another.
Connect phones via OTG and grant USB debugging permission.
Connect the two phones using an OTG cable or a USB-C to USB-C cable. Ensure the host phone shows a charging status. On the primary phone (the one being rooted), a USB debugging permission prompt will appear; tap 'Allow' to grant access. The Bugjaeger app will then recognize the connected device.
Reboot the primary phone to bootloader mode via Bugjaeger.
Within the Bugjaeger app, navigate to the fast boot section and tap on 'Reboot bootloader'. This action will restart the primary phone and put it into fast boot mode, necessary for flashing operations. The device state should show as 'unlocked' if the bootloader was previously unlocked.
Execute 'fastboot flashing unlock' command if bootloader is locked.
If the bootloader is not yet unlocked, open the terminal in Bugjaeger and type the command 'fastboot flashing unlock'. Follow the on-screen prompts on the primary phone to confirm the bootloader unlock, using volume buttons to select and the power button to confirm. Note that this specific command may not work for Xiaomi or Realme devices due to different unlocking methods.
Flash the Magisk-patched boot image to the correct slot(s).
Determine if the device uses A/B partitions by typing 'fast boot get var current slot'. If it returns a slot (e.g., 'b'), flash the patched boot image to that slot using a command like 'fast boot flash boot [path_to_magisk_patched_file]'. If the device supports dual slots, flash to both slot A and slot B by repeating the process or using a combined command. If the device doesn't use A/B slots, you'll use a single flashing command appropriate for the file type.
Reboot the device after flashing to complete the process.
After successfully flashing the Magisk-patched boot image to the relevant slot(s), type 'fast boot reboot' in the terminal to restart the primary phone. As the bootloader was unlocked, all data will have been wiped, requiring a fresh device setup.
Step 5: Verification and Finalization
Magisk app is pre-installed; update and reboot.
Once the device reboots after setup, the Magisk app will be pre-installed. Connect to Wi-Fi and update Magisk to the latest version. After the update, Magisk will prompt for another reboot to apply the changes. Perform this final reboot.
Root access is successfully installed and verified.
After the final reboot, open the Magisk app to confirm installation. To further verify, download and install a root checker app from the Play Store. Opening the root checker app and verifying root access will confirm that Magisk has been successfully installed on the Android phone, granting root privileges.
Method allows rooting without a PC or TWRP recovery.
This completed process demonstrates a method for rooting any Android phone without the need for a PC or TWRP recovery, entirely on the device itself using another Android phone as a tool. The tutorial concludes by encouraging viewers to like, subscribe, and watch for more Android guides.
Ask a Question
*Uses 1 Wisdom coin from your coin balance